Posted on

aXMonitor Update: Personalised Binaural with SOFA Support

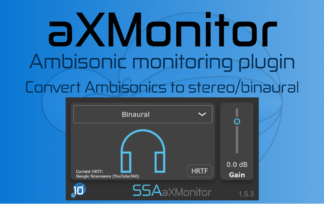
The aXMonitor plugins are today updated to version 1.3.2. If you have already bought one of the aXMonitor plugins, you can download the update from your account.  You should remove any old versions of the plugin from your system to avoid any conflicts.

Today’s update is all about getting more flexibility and personalisation for binaural rendering of Ambisoinics. This is probably the most requested feature update for any of my plugins, so I am very happy to be able to announce the new feature:

  • Load an HRTF stored in a .SOFA file for custom binaural rendering.

This allows you to produce binaural rendering for up to seventh order Ambisonics with whatever HRTF you want, providing you with the flexibility you need to produce the highest quality spatial audio content possible.

If you aren’t sure why so many people want personal HRTF support, keep reading.

Advantages of Personalised Binaural

Binaural 3D audio can be vastly improved by listening with a personalised HRTF (head related transfer function). It’s the auditory equivalent of wearing someone else’s glasses vs wearing your own. Sure, you can see most of what is going on with someone else’s glass, but you lose detail and precision. Wear your own and everything comes into focus!

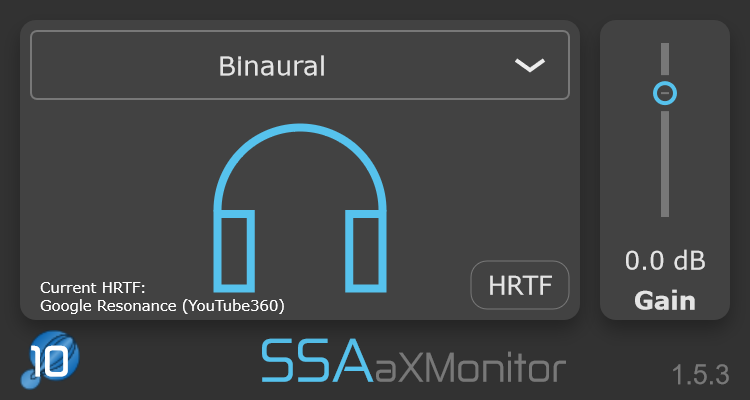
With that in mind, the aXMonitor plugins have been updated to allow you to load a custom HRTF that is stored in a .SOFA file. Now you can use your own individual HRTF (if you have it) or one that you know works well for you. Once an HRTF has been loaded it will be available across to all instances of the plugin in other projects.

What is a .SOFA file?

A .SOFA file contains a lot of information about a measured HRTF (though it can be used for other things as well). You can read more about them here.

Where to get custom HRTFs

You can find a curated list of .SOFA databases here. The best thing to do is to try a few of them until you find one that gives you an accurate perception of the sound source directions. Pay particular attention to the elevation and front-back confusions, since these are what personalised HRTFs help most with.

If you want an HRTF that fits your head/ears exactly then your options are bit more limited. Either you can find somewhere, usually an academic research institute, that has an anechoic chamber and the appropriate equipment. Then you put some microphones in your ears and sit still for 20-120 minutes (depending on their system). Once it’s done, you have your HRTF!

But if you don’t fancy going to all of that trouble, there are some options for getting a personalised HRTF more easily. A method by 3D Sound Labs requires only a small number of photographs and they claim good results. Finnish company IDA also offers a similar service.

Get the aXMonitor

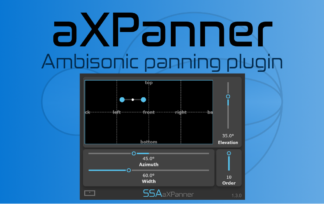
So if you like the sound of customised binaural rendering then you can purchase the aXMonitor from my online shop. Doing so will help support independent development of tools for spatial audio.


a1Monitor


a3Monitor


a7Monitor

Posted on

50% Discount on aXPanner and aXMonitor

Today I’m having April sale and putting a 50% discount on my Ambisonic panning and decoding plugins for Windows (VST) and MacOS (VST/AU): aXPanner and aXMonitor. This offer runs until the 30th April 2018.

The aXPanner converts mono and stereo signals to YouTube360 compatible AmbiX-format Ambisonics. The aXMonitor decodes these Ambisonic signals to two-channel stereo and binaural (3D audio over headphones) formats to allow easy monitoring. Together they form the essential signal chain for spatial audio and are a great way to get started with Ambisonics.

You can check out my short tutorial on getting started with a basic Ambisonics chain here.

The aXPanner and aXMonitor available for three levels of spatial resolution: first, third and seventh order Ambisonics. Higher orders increases the spatial fidelity of the sound scene.

This 50% discount can be combined with additional 20% bundle discounts for additional savings.

You can read more details about them in my web store :

Posted on

aXMonitor Update: Google Resonance Audio HRTFs

Today the aXMonitor plugins get their first major update to version 1.2.2. There are two major updates and one minor updates. Let’s start with the major updates:

  • The HRTFs used for binaural 3D sound have been regenerated using Google’s own Resonance Audio toolkit for VR audio. These are the same HRTFs used by Google in YouTube 360. The code released by Google is only up to 5th order, but was actually quite simple to extend to 7th order.
  • A gain control has been added to boost or cut the overall level for convenience.

The minor update is a fix to make sure the plugin reports the correct latency to the host when using the Binaural or UHJ Super Stereo (FIR) methods.

Google have just open sourced their Resonance Audio SDK, including all sorts of tools for spatial audio rendering. This update to ensures that you can aXMonitor ensures that you can mix your content on HRTFs that will be widely used across the industry.

The aXMonitor is available in 3 versions, providing up to first, third and seventh order Ambisonics-to-binaural decoding.

So if you’d like to start mixing your VR/AR/MR audio content just head over to my store. With your support, I can continue to update the aX Ambisonics Plugins to bring you the tools you want and need.


a1Monitor


a3Monitor


a7Monitor

Posted on

What’s Missing From Your 3D Sound Toolbox?

Audio for VR/AR is getting a lot of attention these days, now that people are realising how essential good spatial audio is for an immersive experience. But we still don’t have as many tools as are available for stereo. Not even close!

This is because Ambisonics has to handled carefully when processing in order to keep the correct spatial effect – even a small phase change between channels significantly alter the spatial effect – so there are very few plugins that can be used after the sound has been encoded.

To avoid this problem we can apply effects and processing before spatial encoding, but then we are restricted in what we can do and how we can place it. It is also not an option if you are using an Ambisonics microphone (such as the SoundField, Tetra Mic or AMBEO VR), because it is already encoded! We need to be able to process Ambisonics channels directly without destroying the spatial effect.

So, what is missing from your 3D sound toolbox? Is there a plugin that you would reach for in stereo that doesn’t exist for spatial audio? Maybe you want to take advantage of the additional spatial dimensions but don’t have a tool to help you do that. Whatever you need, I am interested in hearing about it. I have a number of plugins that will be available soon that will fulfil some technical and creative requirements, but there can always be more! In fact, I’ve already released the first one for free. I am particularly interested in creative tools that would be applied after encoding but before decoding.

With that in mind, I am asking what you would like to see that doesn’t exist. If you are the first person to suggest an idea (either via the form or in the comments) and I am able to make it into a plugin then you’ll get a free copy! There is plenty of work to do to get spatial audio tools to the level of stereo but, with your help, I want to make a start.

Posted on

Ambisonics to Stereo Comparison

In my last post I detailed two methods of converting Ambisonics to stereo. Equations and graphs are all very good, but there’s nothing better than being able to listen and compare for yourself when it comes to spatial audio.

With that in mind, I’ve made a video comparing different first-order Ambisonics to stereo decoding methods. I used some (work-in-progress) VST plugins I’m working on for the encoding and decoding. I recommend watching the video with the highest quality setting to best hear the difference between the decoders.

There are 4 different decoders:

  • Cardioid decoder (mid-side decoding)
  • UHJ (IIR) – UHJ stereo decoding implemented with an infinite impulse response filter.
  • UHJ (FIR) – UHJ stereo decoding using a finite impulse response filter.
  • Binaural – Using the Google HRTF.

The cardioid decoder more quickly moves to, and sticks in, the left and right channels as the source moves, while this is more gradual with the UHJ decoder. To me, the UHJ decoding is much smoother than the cardioid, making it perhaps a bit easier to get a nice left-right distribution that uses all of the space, while cardioid leads to some bunching at the extremes.

The binaural has more externalisation but pretty significant colouration changes compared to UHJ and cardioid decoding, but also potentially allows some perception of height, which the others don’t.

The VSTs in the video are part of a set I’ve been working on that should be available some time in 2018. If you’re interested in getting updates about when they’re release, sign up here:

Posted on

Ambisonics Over Stereo

Ambisonics, especially Higher Order Ambisonics, is great for 3D sound applications. But what if you have spent a long time mixing for a 3D audio format but want to share it with listeners who are only listening on stereo?

The first thing depends if they’re going to be using headphones or loudspeakers. If they’re using headphones then you can create a binaural mix in the usual way. If they are using loudspeakers then binaural is no longer an option (unless you want to go down the fragile transaural route). In this post we will focus on how you can decode from first order Ambisonics to stereo using one of two common options.

Mid-Side Decoding

The first option is probably the simplest – treat the Ambisonics signal as a mid-side recorded scene by taking the W and Y channels, with W being the mid and Y being the side. Then you can make your left and right (L and R) stereo playback channels using \begin{eqnarray} L = 0.5(W+Y),\\ R = 0.5(W-Y) \end{eqnarray}

This is effectively the same as recording a sound field with two cardioid microphones pointing directly left and right. Sounds panned to 90 degrees will play only through the left loudspeaker and those at -90 degrees through the right.

The advantage of this sort of decoding is that it is very conceptually simple and, as long as your DAW can handle the routing, it is even possible to do without any dedicated plugins. It also results in pure amplitude panning, meaning that it has all of the advantages and disadvantages of standard intensity-stereo. However, we’ve got another option to choose from when we want to play back over a stereo system that has some advantages.

UHJ Stereo

A more complex and interesting technique is UHJ. We’re only going to go over how UHJ for stereo listening, but it is worth noting that UHJ is mono compatible and that a 4-channel version exists from which full first-order Ambisonics information that can be retrieved via correct decoding. 3-channel UHJ can get you a 2D (horizontal) decoder by retrieving the W, X and Y channels. A nice property of the 3- and 4-channel versions is that they contain the stereo L and R channels as a subset. This means, importantly, 2-channel UHJ does not require a decoder when played back over two loudspeakers. All you need to do is take the first two channels of the audio stream. 

The stereo L and R channels can be calculated using the following equations:\begin{eqnarray} \Sigma &=& 0.9397W + 0.1856X \\ \Delta &=& j(-0.3430W + 0.5099X) + 0.6555Y\\ L &=& 0.5(\Sigma + \Delta)\\R &=& 0.5(\Sigma – \Delta)\end{eqnarray} where \(j\) is a 90 degree phase shift.

You can see from these equations, converting to UHJ from first-order Ambisonics results in signals with phase differences between the L and R channels. This creates quite a different impression to the kind of mid-side decoding mentioned above. There will obviously be some room for personal taste as to whether or not UHJ is actually preferred to mid-side decoding. Sound sources placed to the rear of the listener are more diffuse when reproduced of a stereo arrangement than those at the front, while for mid-side decoding there is no sonic distinction between a sound panned to 30 degrees or to 150 degrees.

Beyond front-back distinction, UHJ can actually result in some sounds appearing to originate from outside the loudspeaker pair by a small amount. This is why it is sometimes referred to as Super Stereo. In my experience, this effect is very dependent on the sound being played, both its frequency content and how transient it is.

Figure 1: The (high frequency/broadband) localisation curves for UHJ and Mid-side decoding of an Ambisonic sound source over two loudspeakers at +30 and -30 degrees.

Because UHJ stereo relies on phase differences between the two channels, any post-processing or mastering applied should preserve the phase relationship between L and R, otherwise there is a very real risk that the final presentation will be phase-y and spatially blurred.

Figure 1 shows the localisation curves for a sound played back over a stereo system where the signal in the Ambisonics domain is panned fully round the listener. Obviously the sound stays to the front, but the actual trajectories between UHJ and mid-side decoding are quite different. (These localisation curves were calculated using the energy vector model of localisation, so they are most appropriate for mid/high frequencies and broadband sounds).

Which of the two stereo loudspeaker decoding strategies you’ll want to use will depend on the needs of your project. Mid-side decoding is simpler and results in pure amplitude panning. UHJ can result in images outside of the loudspeaker base, but relies on the phase information being preserved. If you want to retrieve any spatial information then UHJ is absolutely the way to go.

Tools for Stereo Decoding

I have an old Ambisonics to UHJ transcoder VST that you can download here, but they are old and I am not sure how compatible they are with newer version of Windows and Mac OSX. To remedy that, I’ve been working on an updated version that will provide simple first-order to stereo decoding. Just select which method you want to use and pump some Ambisonics through it. Keep an eye out in the near future for when it is made available!

I’m curious to hear from anyone who has used both techniques what you prefer. Leave a comment below!